| 9/8/2003 It's my biggest 'Honey Do' home improvement project yet. After months of hints and
prodding, I broke down and agreed to add some living space to our home
by finishing a third of our walk-out basement. The following are logs
that I am making as I go along so that you can check in on my progress
(and let me know of all of those code violations you see :-). By the
way, the reason that we are adding this space now is that we really
needed a separate kids' room and this will serve this purpose well. Log Entry 1: The first thing that was necessary was to
actually make room in the basement given that the area where I was
putting the room housed the pantry, excess furniture, a wall of shelves
and bookcases, and a whole lot of junk. So off I went to the Salvation
Army where I made a number of donations, giving away probably a third of
our 'stuff' so as to make some room.
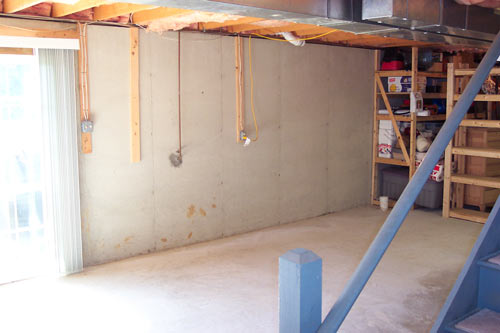
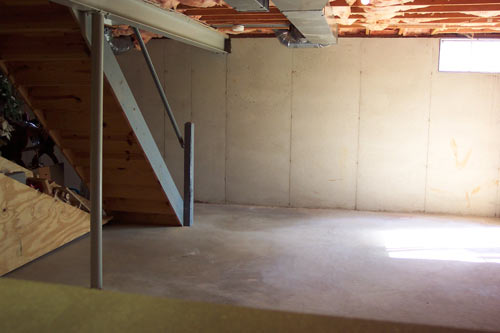
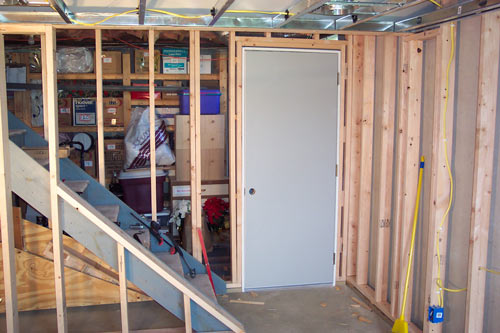
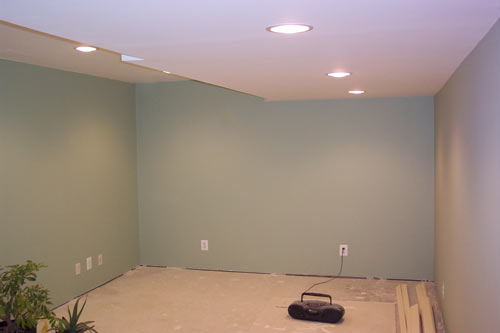
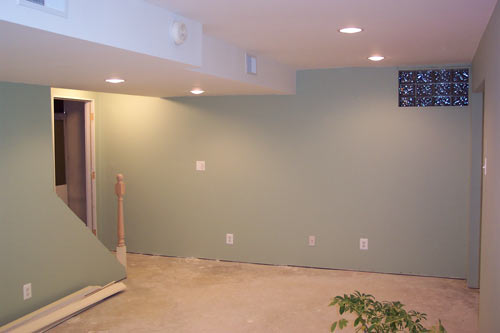
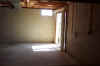
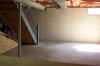
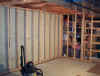
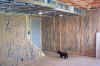
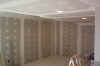
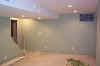
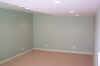
Log Entry 2: Here are some photos of the space that
is being finished off, once I cleared out all of the stuff. The space is
about 12' x 23' with a ceiling of 6.5' under the ducting and 7.5'
otherwise, and will suit a playroom/entertainment room. It has your
typical poured foundation walls and a concrete slab floor. First order of
business: off to Home Depot for some wood!

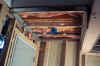
Log Entry 3: I think they know me by name at the
Depot . . . Anyway, as I started laying out my framing, I took a gander at
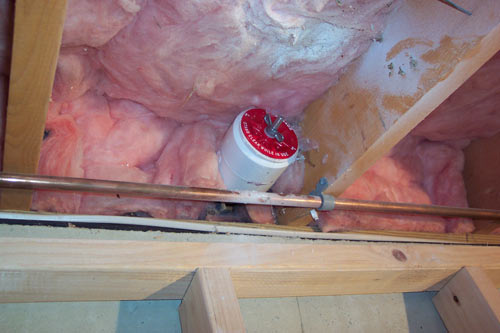
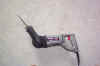
potential problem areas; there were four. Here you can see the radon
piping sticking down from the ceiling; it's definitely in the way. Then
there's the water pipe that goes to the outside faucet; it's definitely in
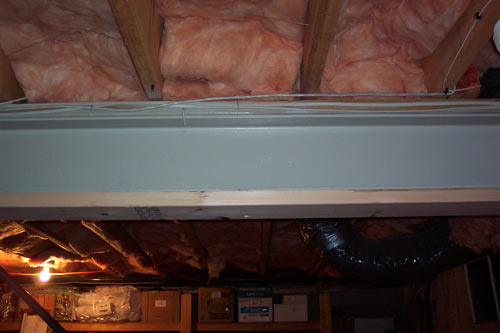
the way as well. There's all of the HVAC ducting, but I'll just need to
frame around it. And finally, there's that I-beam. Now what to do with
that . . .
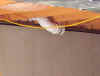
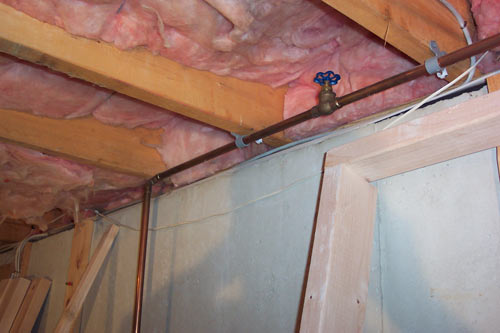
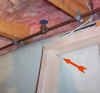
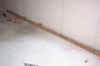
I cut the radon pipe back and fitted it with the
expandable plug you see below; it's not used nor ever will be, so this
should work fine. As to the water line, I needed to notch out the back
side of the top of the wall I'm framing to account for it, and the arrow
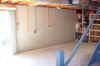
below shows it done. As to the I-beam, I decided to bolt 2x6's onto the
bottom, providing a backing for the drywall and my steel studs that will
be framing out the ducting.


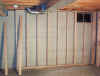
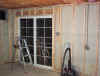
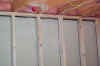
Log Entry 4: The framing has begun. Given the
racket it causes, my wife would like it to be done yesterday; can't say as
I blame her. Here I've completed what I call 'phase 1': framing nearly
three walls including around the window and sliding glass doors (and that
pesky water line). By the way, I've decided to go with a glass block
window to replace the crappy one that's in there now. It's a special order
at Home Depot; should be fun!.

You'll note here that I'm using pressure-treated wood for
the sole plate, positioned about 2" from the wall to allow air
circulation (the gaps behind the walls will be open to the unfinished
portion of the basement), and fastened with powder-actuated fasteners.
Though we have a very dry basement, I've decided to use a drywall primer
that acts as a vapor barrier just to keep any condensation to a minimum if
it occurs at all.
So what are the other phases? Well, phase 2 is to finish
framing out the two side walls under the ducting as well as the last wall
that attaches to the side of the steps. Phase 3 is framing out the ducting
in the ceiling using light-weight steel studs (they could have put the
ducting on the side of the basement opposite the walk-out, but then
builders are like that sometimes; so I'm losing a good amount of headroom
for a third of the room which I'm not too excited about).
Phase 4 is framing out the wall on the opposite side of
the stairs as well as an opening for the steel door that will provide some
noise insulation from the shop on the unfinished side (I do have to say
that I'll miss the natural light that I get coming into the shop now;
can't have it all I guess). I figure it'll take me a week to finish the
framing; then onto flooring, electric, insulation, drywall, trim, painting then
wainscoting. Whew! The end seems so far off.
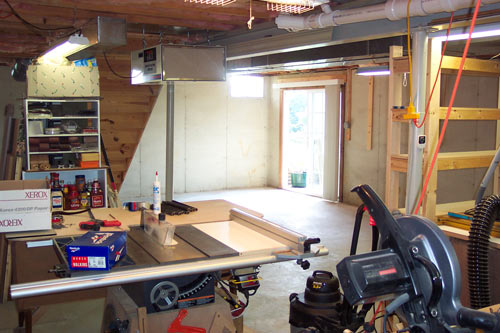
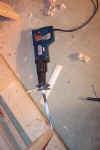
On a sad note, there was a death today in my power tool family.
You can see it below giving up the ghost. This offers an opportunity for
me to espouse my tools philosophy of always spending the money for good
tools because they will be a pleasure to use and will stay around for a
good long time. Usually I adhere to my own advice, but I decided to buy
this imported Chicago-brand recip saw from Harbor Freight, thinking that I
don't use recip saws very often, and it died today after little use. So
now I'm going with a P-C TigerClaw that will also allow me to get in
between the studs with its unique twisting action. Just a thought for you
for your next holiday/birthday/anniversary gift (you can buy yours here!).
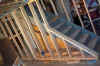
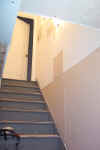
Log Entry 5: I finished framing out around the
stairs. I'm 95% done with framing; only have the door to the shop to frame
out and then my wife will be very pleased as the noisy part will mostly be
over. The stairs were a little tricky; on the other side there are low
joist hangers and ducting to account for, and on the near side I went with
2x6s for part of the wall to steady the stairs. Once I get drywall and
ballisters up it'll start looking pretty good.
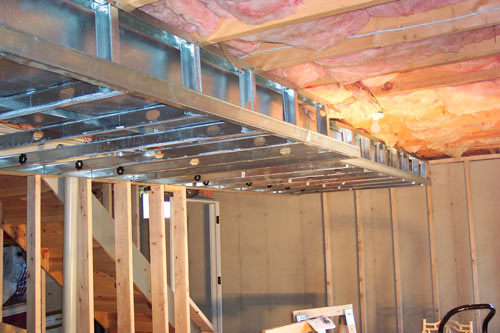
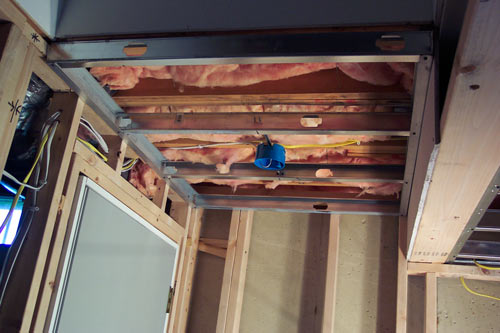
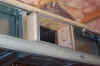
Log Entry 6: I finally finished the $%*&!!@
ceiling framing. Not having worked with steel studs before, it wasn't too
bad; easier than I thought it'd be. The problem came when I went to lift
and attach each of the two assemblies to the ceiling and side wall track.
Needless to say, this is a two-person job, however I'm not one to wait for
help when I know it won't come for 24 hours, so after a whole lot of
effort I finally got everything hung. The casualty was the outside track
in the right picture below. In the end it was so twisted that I had to
replace it with another, straight track, once it was up. This is where the drywall will
attach so it's important that it be straight. I would recommend working
with steel studs; they are so much lighter than wood, and 40% cheaper as
well. Plus, if you do something wrong, it's much easier to reverse things;
just unscrew a screw. On to hanging the lights, outlets, switches and
wiring . . .


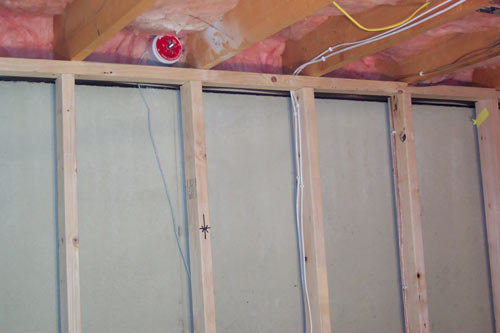
Log Entry 7: Today I finally finished framing the
area around the stairs and the door to the shop. You can see the result of
my effort below. I've also roughed out most of the wiring and
junction/outlet boxes. It was a nice break from framing while I waited for
my Porter-Cable TigerClaw to be delivered from Amazon. Allow me to digress
by talking briefly about this saw. It's great! The ability to rotate the
blade in both planes allows you to do most any recip job with ease. I
would highly recommend this saw. The only downside to it is the vibration.
If you'll be using one all day long I would recommend those gel
anti-vibration gloves.
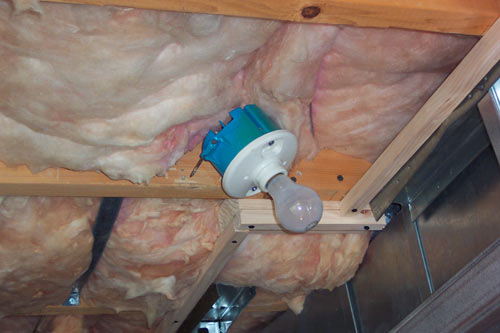
As to the wiring (I won't fess up to having to wire all of
the [insulation-rated] recessed lights twice; code requires wires to be clamped, you see . .
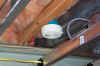
.), what's left is the trickiest part: installing two sconce lamps and
switches in the stairway, relocating the ceiling light and smoke detector
below, rewiring the circuit for the lights in the unfinished part of the
basement, installing the breakers, and building a false ceiling to accommodate
the junction box for a light I'm putting up in the landing of the stairs.
You can see in the last picture on the right, that the two joist spaces
that would have accepted this box both have ducting in them (one is
covered by fiberglass). Hurdles like these seem to always be popping up,
which tends to get a little tedious. By the way, I'm going with a 20 amp
circuit for the outlets; eight in total. You never know what type of home
entertainment system will eventually be placed in the room, so it's better
to go with overkill than not have enough amperage. 20 amps will give you
20x120v=2,400 watts. The rule is to max out at 80% which works out to a
common rule of 100 watts per amp; plenty for my dream system!

By the way, if you would like a TigerClaw of your own, did
I mention that you could buy it here?
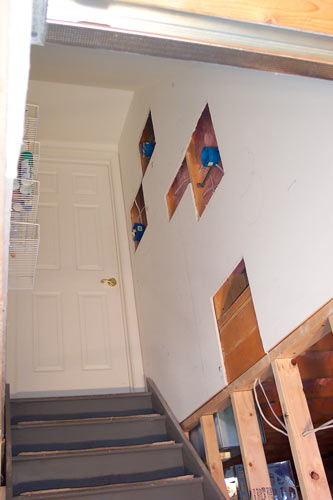
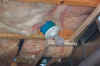
Log Entry 8: Finally, with the completion of the
stairwell wiring and false ceiling above the bottom landing that you can
see below, all pre-drywall wiring is now complete. Over all, two new
circuits were installed, another rewired and new multimedia lines were
threaded for future multimedia needs. In the picture on the right you can
see the speaker wires, cable and phone lines, and CAT-5e wiring that has
been threaded from a router upstairs, through the attic, down the PVC pipe
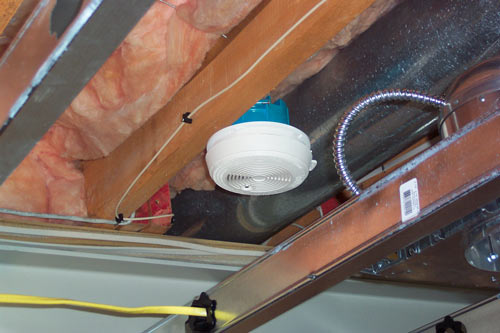
and into the wall. Last steps before insulation is moving the hard-wired
smoke detector and framing out the two HVAC
vents.

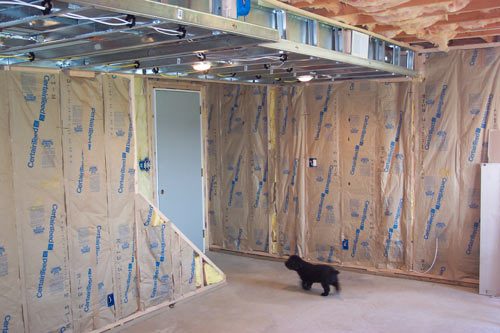
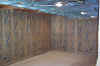
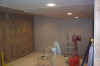
Log Entry 9 - 10/6/03: Well, it's been a month
since I first started this project. Let me pause to take a breather . . .
Okay, having moved the smoke detector and having framed out the two HVAC
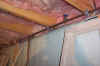
vents, in the picture at left below, I was ready to start putting up the
insulation. Over the course of the next two days, I reached another
milestone, having completely installed the insulation (I chose to use the
encapsulated stuff; it's more expensive but much less of a mess, although
having to tear the batting in half to get around the electrical wiring
defeated some of this benefit).

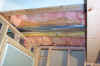
For the first time you can get a good perspective on the
definition of the room size. In the third
picture you can also get a glimpse of my shop pooch; our toy/miniature
poodle whose company we have enjoyed for over eight years. Next stop?
Putting the ceiling drywall up. I'm hoping that doesn't take more than a
couple of days.
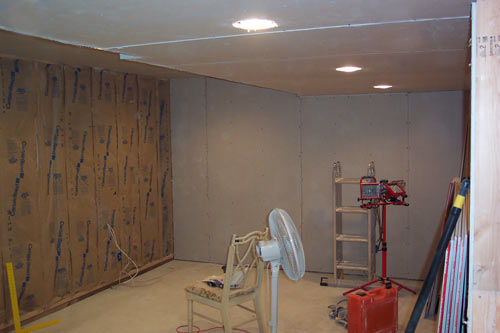
Log Entry 10 - 10/10/03: Phase one of project 'hang
drywall' is complete; that is, the ceiling and two of the four walls have
been hung. With the help of a couple friends, Mike D. and Mike S., it only took about six
hours. Phase two, the balance of the hanging, will go up later this week.
Then it will be on to taping; any volunteers??
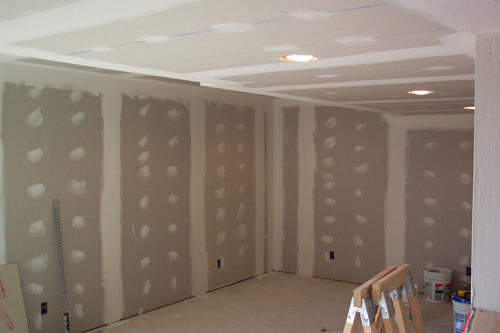
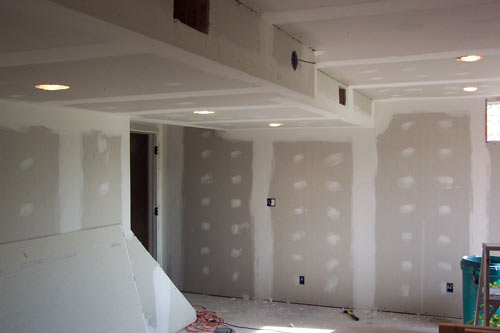
Log Entry 11 - 10/25/03: It's been two weeks and I
am pleased to say that phase two of the drywall is complete; all walls are
hung and the taping and spackling is nearly done. I paid a friend of mine
to do this as 1) I'm not the greatest spackler and 2) I hate doing it
(perhaps the two are related??). Thanks Dave G. for helping out. By the way,
let me recommend the vinyl beading that adheres to the drywall with an
adhesive spray. So much easier than screwing metal beading on.

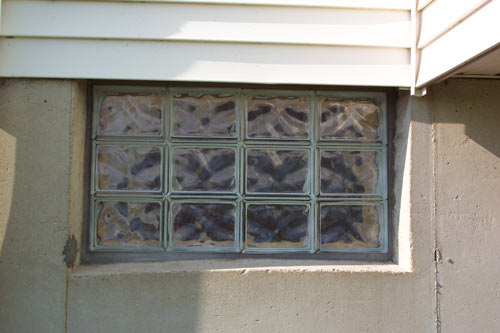
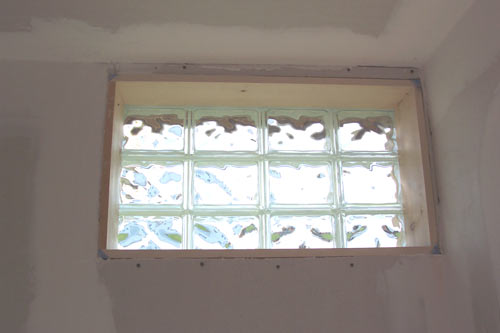
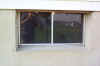
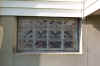
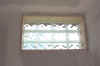
The first photo below is of the original basement window;
the typical cheap pull-out type found in most of America's basements (yep,
that's me in the reflection taking the picture). I chose to replace it
with a custom-made glass block window from Home Depot. You can see it
below as well. I thought it was reasonable for about $85 and adds a lot to
the looks of the room. Thanks to Tom L. for his skills in putting it in. Dave
and Tom both did a great job.
Once the final sanding is complete, it'll be time to paint
on the drywall sealer; it's a special sealer from Benjamin Moore that acts
as a vapor barrier, and after that it'll really start looking like a real room.
Log Entry 12 - 11/2/03: The final sanding. sweeping
and cleaning up of spackle from the floor, is finally done. Today the
first coat of sealer will go up. I'm anxious to see how well the sealer
hides the tape marks, small imperfections and such. We also were out
shopping for carpet and paint. The end is in sight and I can't wait to
move the furniture in and take a nap!
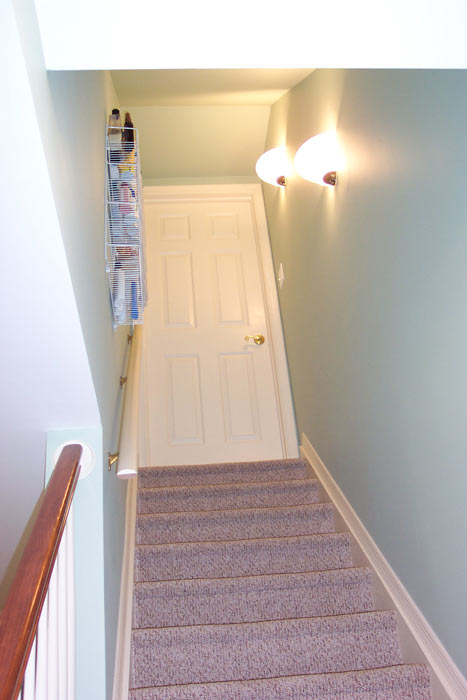
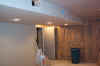
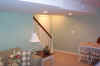
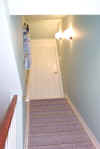
Log Entry 13 - 11/17/03: The paint is now up and I
think the sage green my wife picked out looks great. I pre-painted all of
the trim a cream-like color; it's a pleasing combination. The sconce
lights in the stairwell turned out well also. Now we wait for the carpet
to go in tomorrow. Then it's onto the trim and it'll just be about
finished. One note: I found out the hard way that you really need to screw
the banister to the wall; nails don't provide enough holding strength to
withstand the stress that a stair rail receives through daily use.


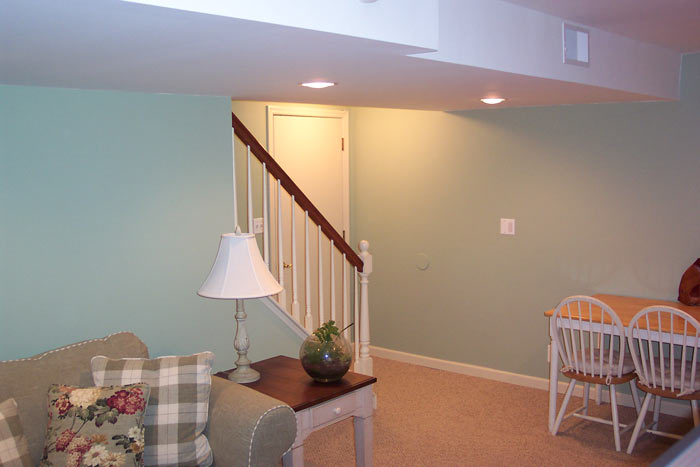
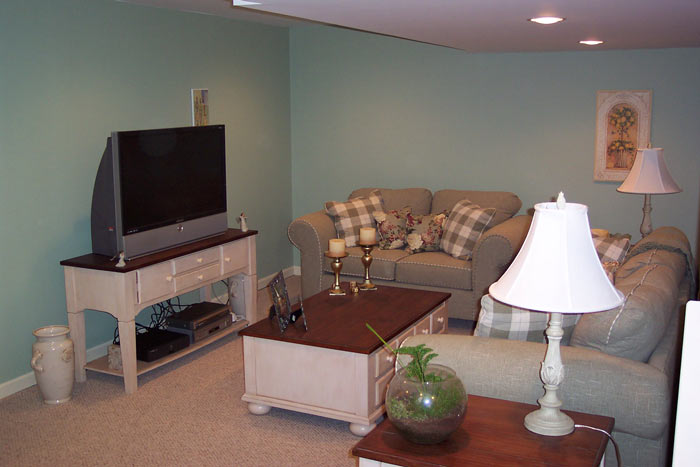
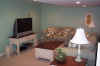
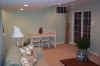
Log Entry 14 - 11/20/03: Now that the baseboard and
trim is finished (definitely put up the trim before the carpet goes down
or you'll end up with gaps where the floor is uneven) and the carpet is down, the following pictures are of the
finished room; both without and with furniture. It's amazing how the room
shrinks when you put furniture in it. The couch is a pull-out
queen sleeper for when guests come over (the love seat is really a
sage green though it looks brown in the photo). The matching sofa table is
where I put my wide-screen 43" DLP television (if you're thinking of
going plasma, bear in mind that plasma screens are more expensive and
susceptible to burn-in, a risk you take when playing games on your
PlayStation or if you don't stretch width-wise all of the non-high
definition programming). By the way, if you've viewed our
Jamaica vacation
pictures, that giraffe in the corner will look familiar. EDIT: It is now
19 years later and I gave away my $4,000 DLP television that was cutting
edge back in the day and replaced it with a smart TCL 4K flat screen.
Smart TVs are great!
All in all, I don't know if I'd tackle this home
improvement project again
if I could actually afford to have someone do it for me, but it's sure
been a learning experience. Well, on to the next honey-do project I guess!
|